
So lately, I have had an interest in building something physical instead of just coding. So I have been building electronic “things” using my Arduino. While doing these projects I found that programing small chips while using an Arduino involved a lot of wires and connections. Why did it need to be so messy? How could i make this easier? So I set out to help myself clean up this process, and speed up the time it takes to program a chip.
One of the worst part about programing a new chip is trying to remember which pins are what? MOSI, MISO and SCK? Having to refer to the data sheet every time was a hassle. So here is what i decided to do.
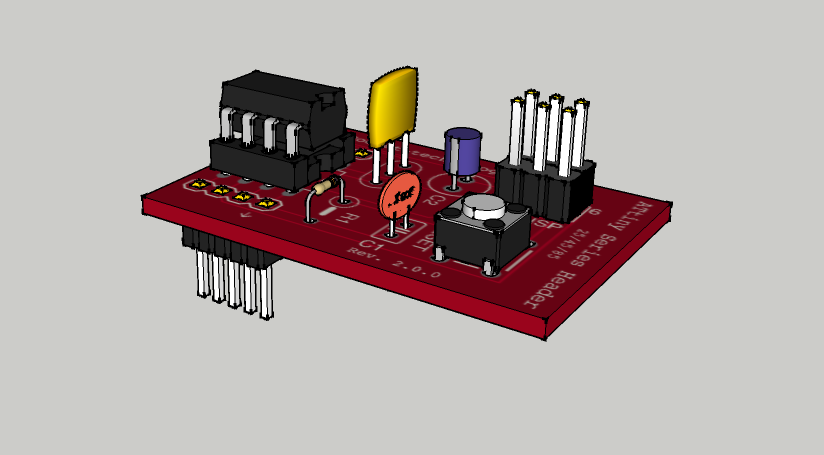
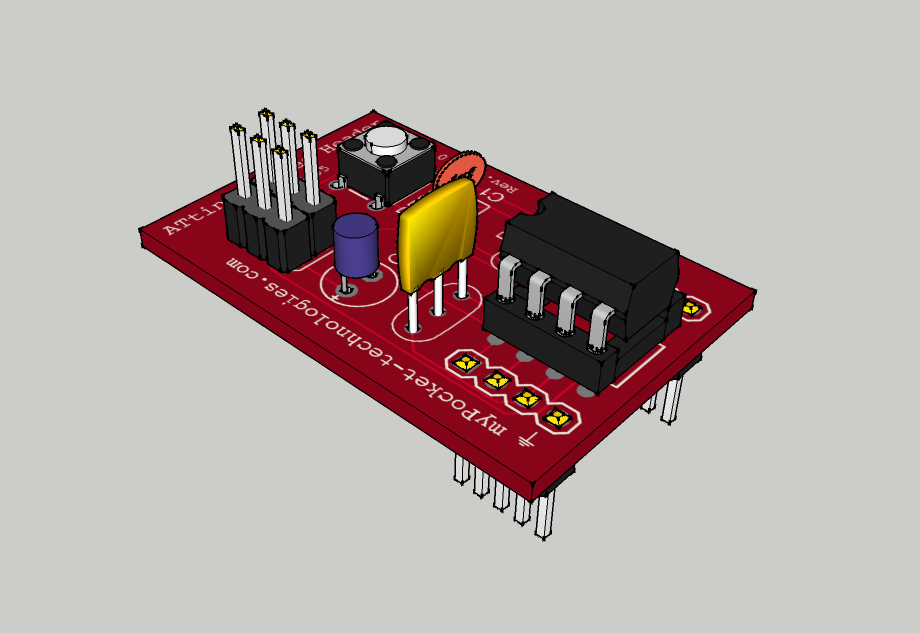
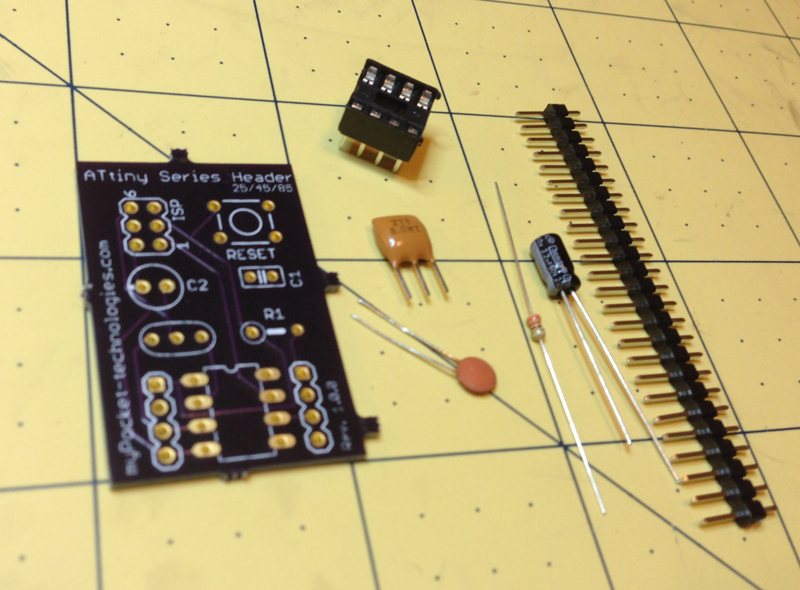
This tiny controller board is build to provide a quick start for projects with 8 pin AVR microcontrollers, e.g. ATtiny13, ATtiny45, ATtiny85. They don’t include any fancy stuff, they are just as simple as possible.
Make One
If you would like to make one of these here’s how. This list of part you will need are as follows:
- 8 MHz resonator
- Reset pull-up resistor and reset switch
- 100 uF radial electrolytic capacitor
- 104 ceramic capacitor
- 8 pin DIP Socket
- 14 male header pins (6 pin used for ISP (In System Programming) header)
Install these boards
Arduino Preferences
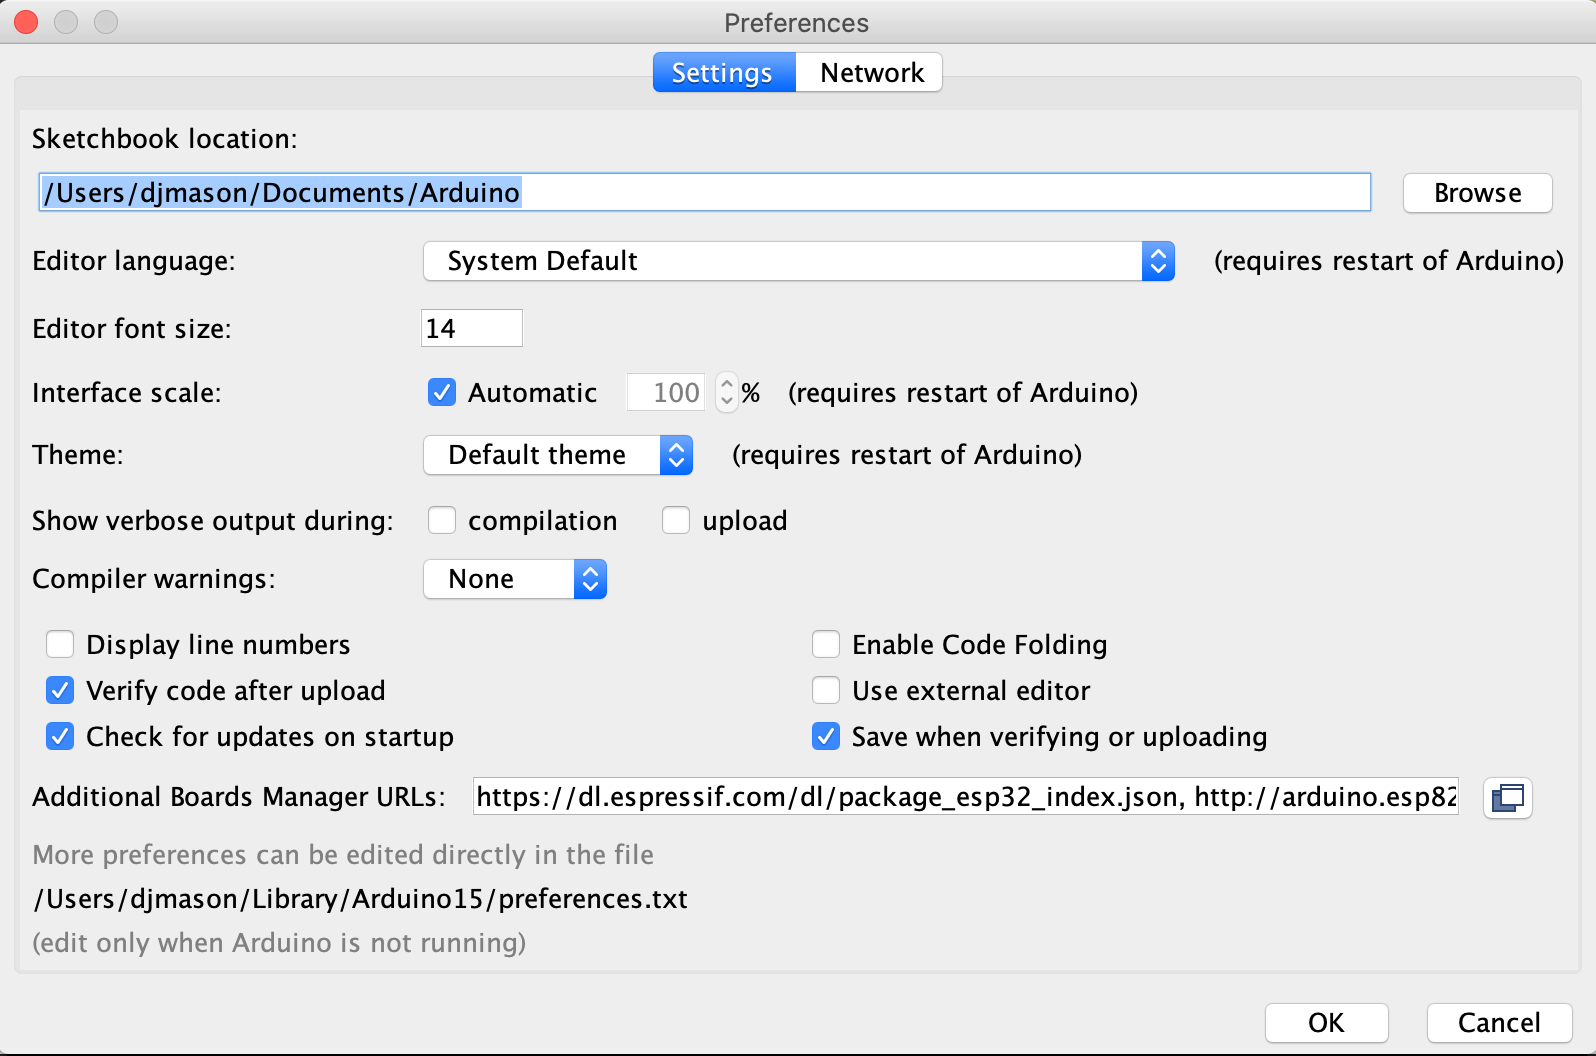
https://raw.githubusercontent.com/damellis/attiny/ide-1.6.x-boards-manager/package_damellis_attiny_index.json
One other thing I found useful was to make my own cables. I happen to have laying around my house 3 old PC’s that were long dead. Inside those old PC’s is a gold mine of junk. Mine had all sorts of useful cables and things. Specifically the speaker and HD indicator cables. I just happen to have a couple long ones with 3 pin female ends that I found worked perfectly as a 6 pin ISP cable.

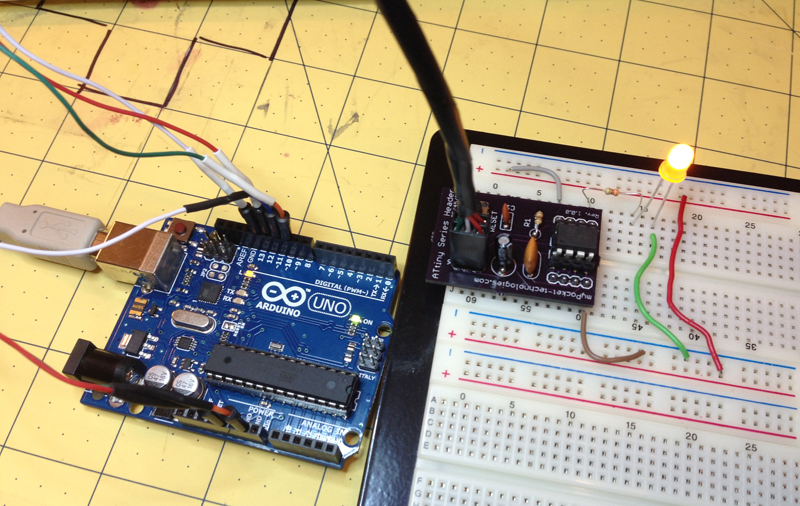
Tiny 85 Pins   |  		Arduino Pin
__________________
7			|		13	SCK
6			|		12	MISO
5			|		11	MOSI
1			|		10	RESET
8			|		3.3V
4			|		GND
Make One
Get 2 nice long 3 pin plugs out of an old PC. 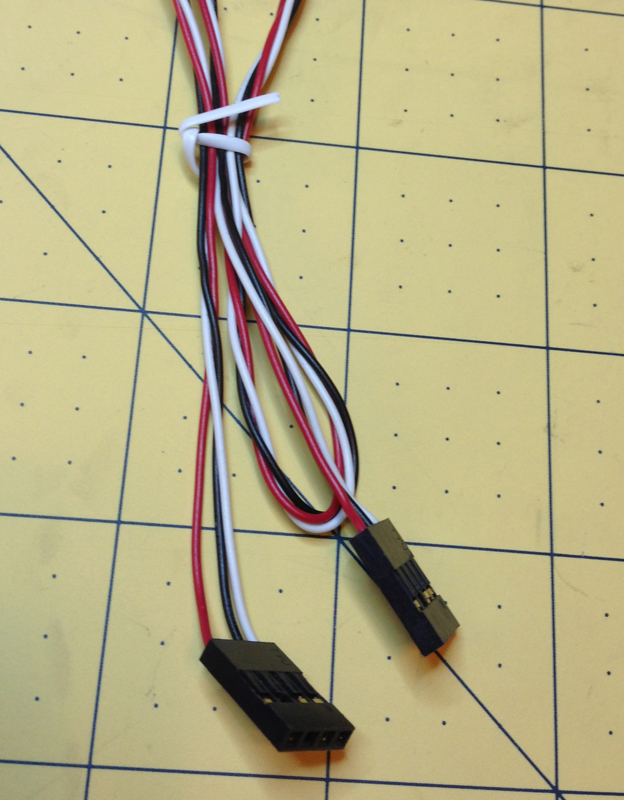
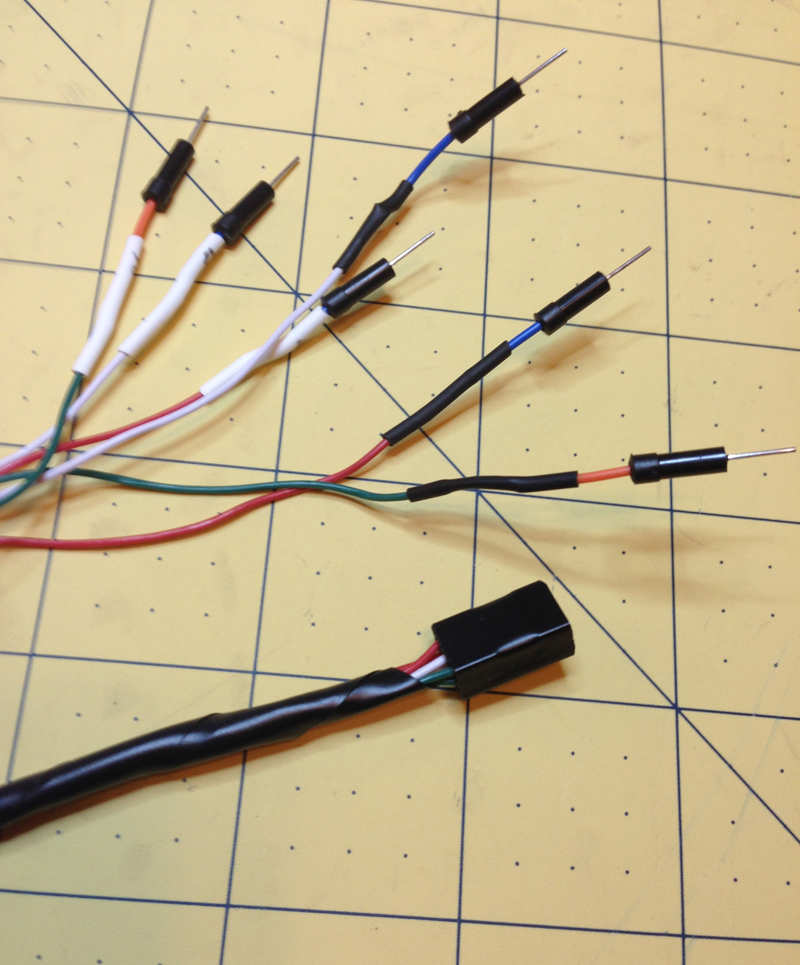
Wrap it with electric tap on the header end. Allow the other end to be free with the wires. Take each wire and attach header pins so you can plug them into your Arduino easily. Then take electrical tap and shore up the wires leaving the last 5 inches free to dangle. That’s it you have a custom 6 pin ISP interface cable.
Last Word
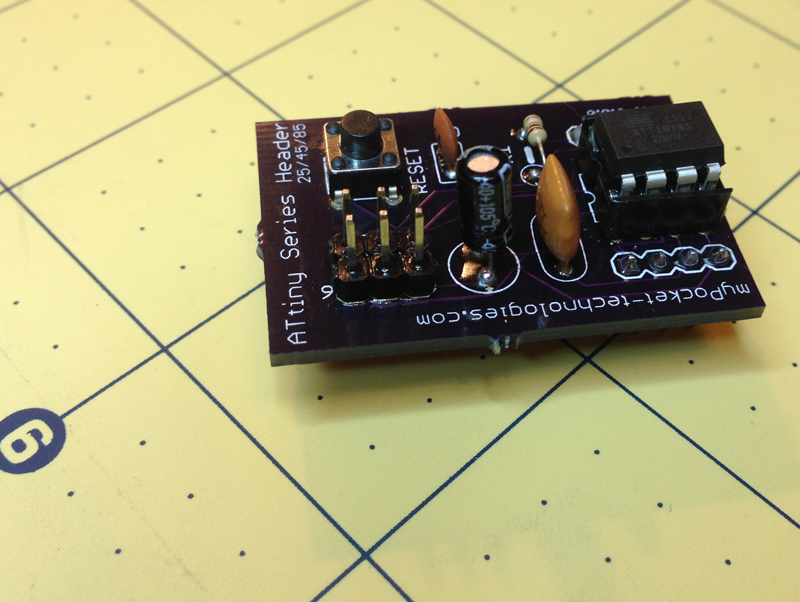
Once I was happy with this design I sent the board away to oshpark.com to be made. The board was $7 (for 3 boards) And I can not speak more highly of the people running that operation. Really GREAT customer service and just real good quality work.
Final Result (The Blinking Light)
Code
Tiny45Header files