
![]()
Prerequisites
– Basic understanding of Node.js
– AWS Account (this is easy)
– Blynk.io account
– Amazon Echo
– DC5V LED WS2812B panel (found on ebay)
Blynk.io
The first thing you will want to do is sign up for a blynk account. This is a great place to allow you to connect of hundreds of IoT device including ESP32, ESP8266, Arduino and much much more.
Once you have done that you will have a Auth Token that you will need to connect to your device. For more on what this site can do for you there is a ton of example code and documentation on there.
They also have a ReST API that you can use to call your sketches with. This is how we will be connecting our Alexa skill to our code. (more on that later).
Alexa Skill
To create an Alexa Skill you will need an account. Sign up or sign in and proceed to the Alexa Developer Console. Once you are there you will need to create a new skill (Create Skill button).
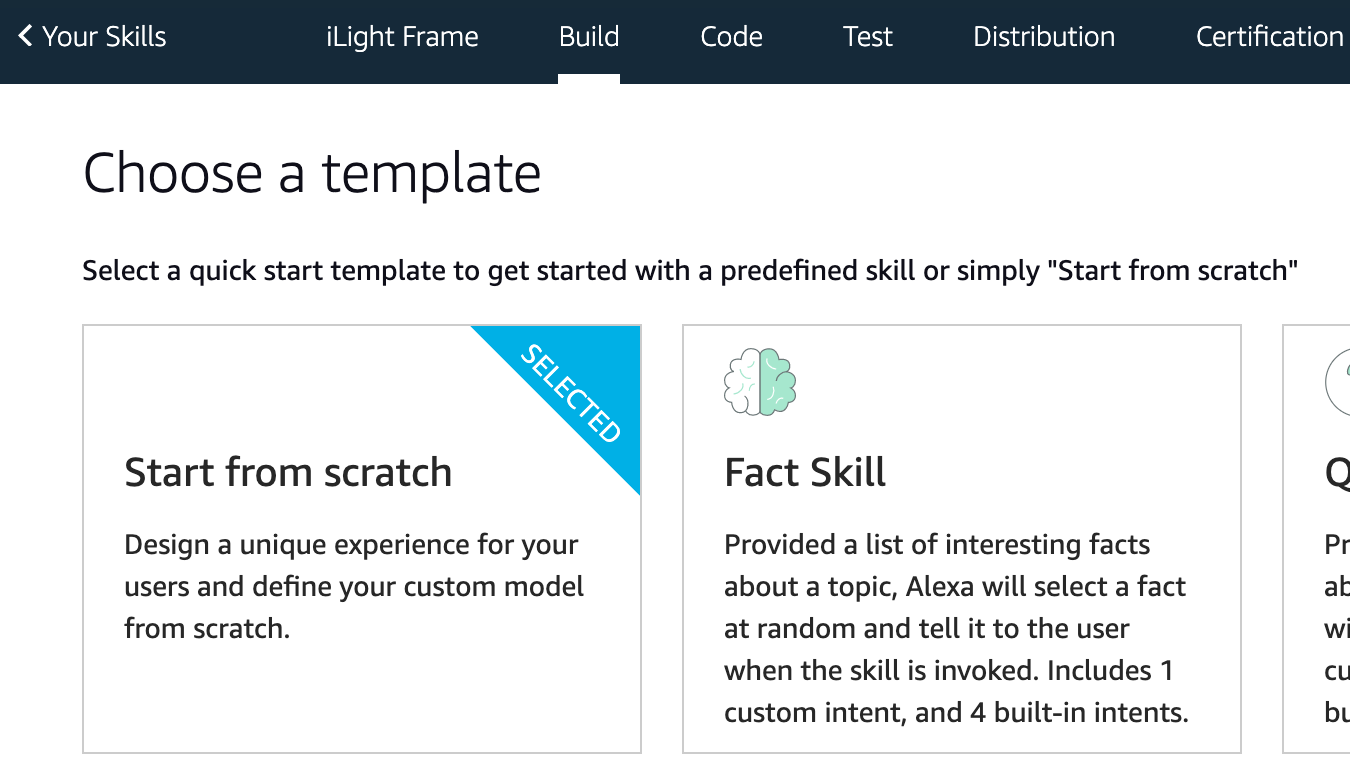
You’ll need to next name your skill. I named mine Light Frame but you can name it what ever you like. Choose the custom model and continue. The we will choose the “Start from scratch” template and continue.

How we are going to make this skill is you can simply copy my JSON code into your skill. Start by copying this code.
Basically this is all the code that is needed to make a fully formed Alexa Skill. You will want to look for the JSON Editor and paste that code into it.
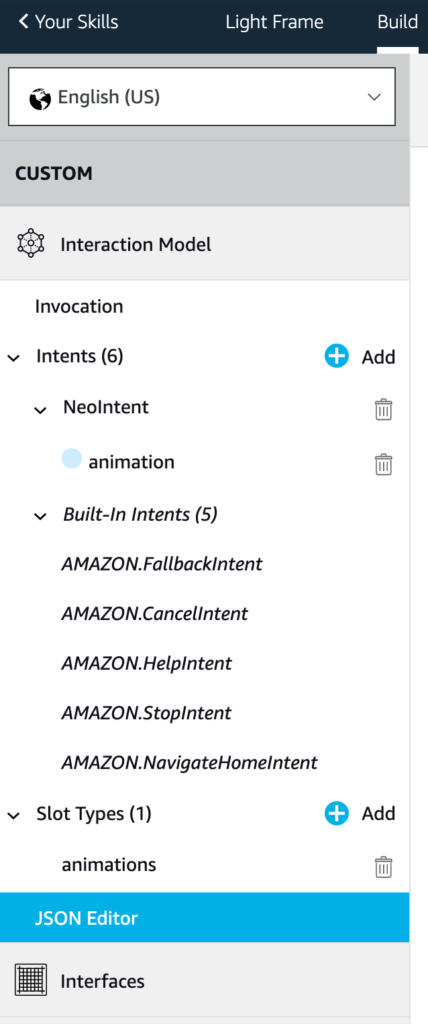
Make sure you hit Save Model at the top of the screen. Then click on the build tab at the top of the screen. This should bring you back to the home page.
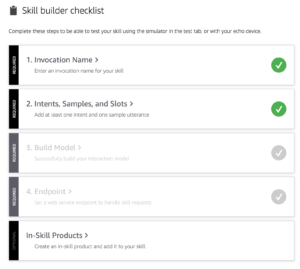
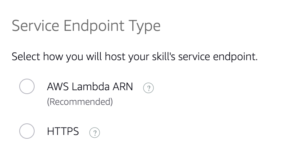
Youre going to want to make sure all those check boxes are green. To do this you have to click on each one that is gray. The build does just that, it builds your project. The end point is where you are going to connect to your Lambda. Lets click on the Endpoint box and go to where we will link our Lambda. For this we will want to choose the radio button AWS Lambda ARN you should now see your alexa skill id (something like this: amzn1.ask.skill.7dad778f-30b2-4c88-b48e-dc9dc1bc2f6b) Copy that or save hold on to it somewhere.
Now lets make our Lambda. Open a new tab in your browser to do this becasue we have to jump back and forth from Alexa skill to Lambda so we can put in the correct endpoint and Id information.
AWS Lambda Code
Next we need to set up an AWS Account. Theres nothing much to this just sign up its free and the Lambda’s are free to use (within reason).
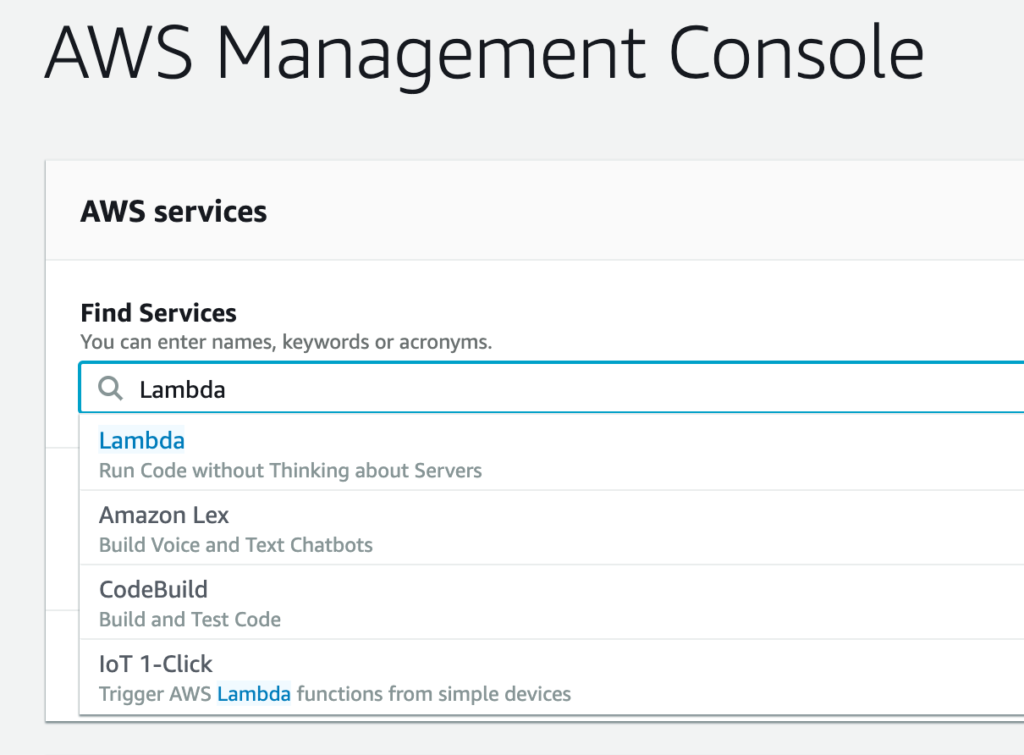
Once you get your account set up you will need to go to the console and filter down to the Lambda functions.
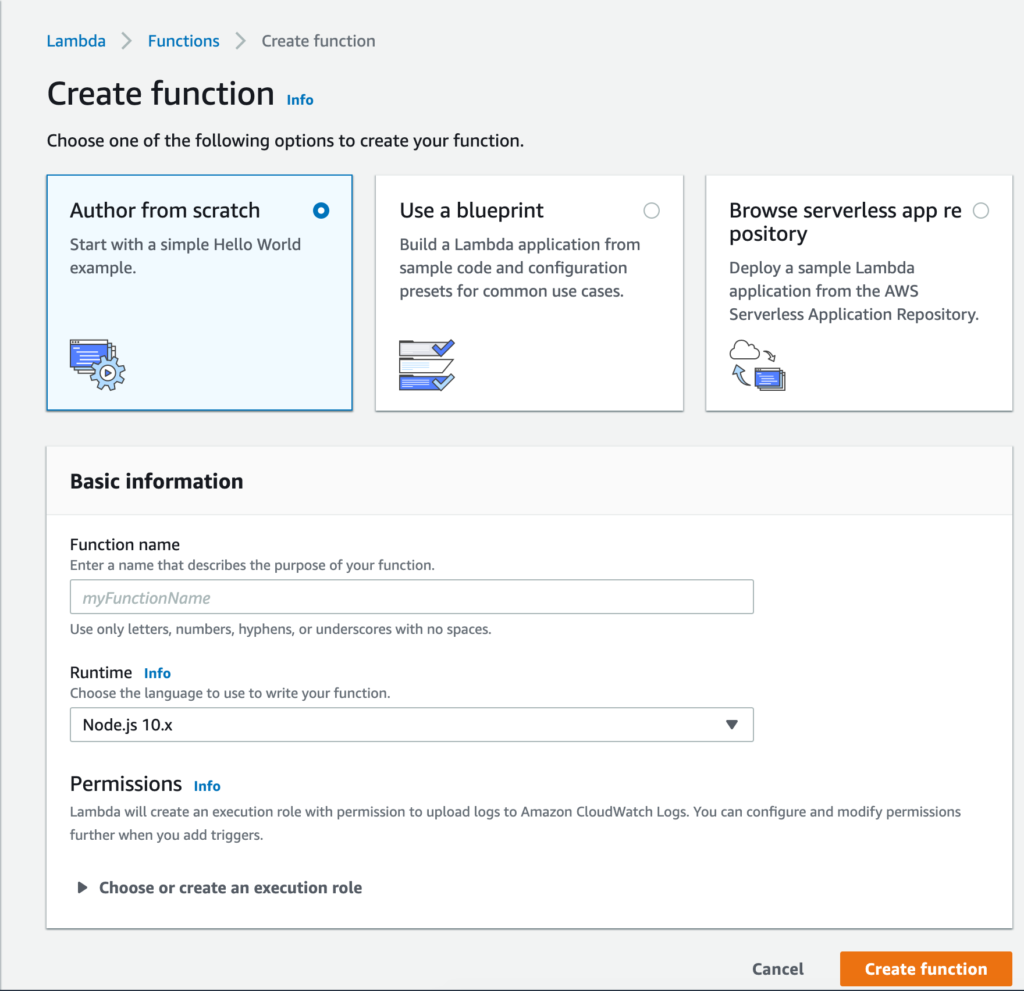
Once you are there you should see a Create function button

Choose Author from scratch, give your function a name and keep the default Node version.
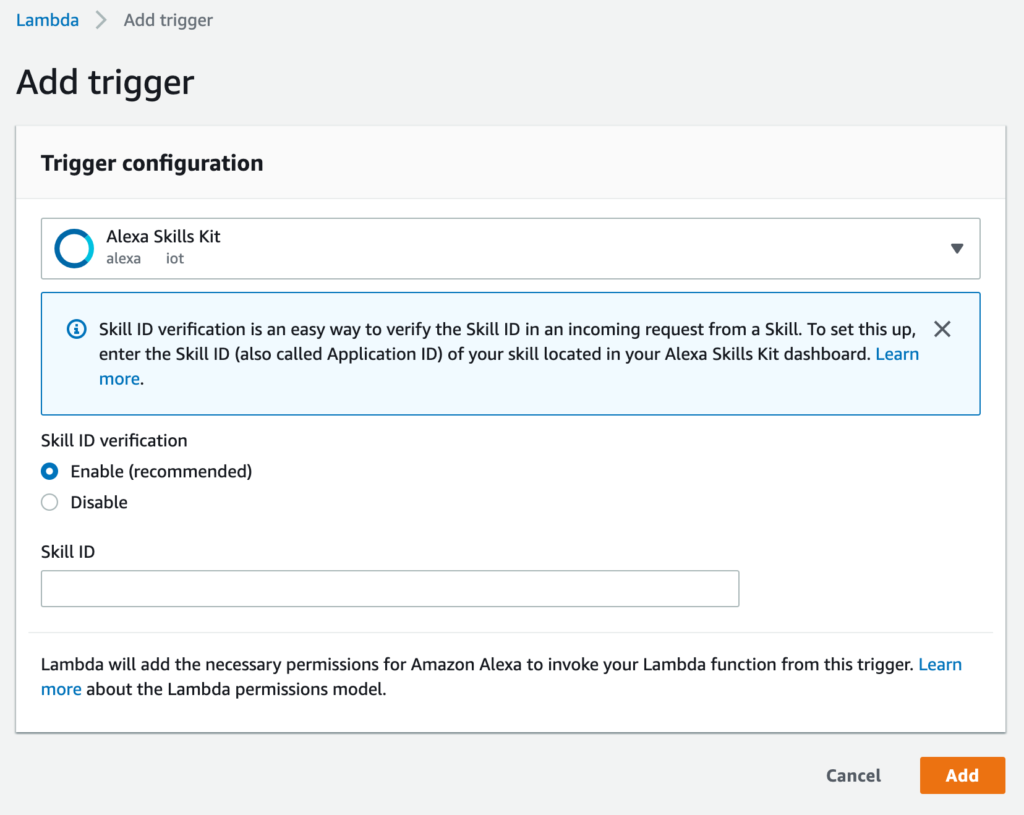
Once you are done with that you will want to add a trigger. You should see that + Add trigger button on the left side of the screen. Click that and locate the Alexa Skill Kit. Choose that and under the Skill Id you will want to put the Id of your Skill you created. (see above something like this: amzn1.ask.skill.7dad778f-30b2-4c88-b48e-dc9dc1bc2f6b remember?)
Once thats done you can put your ARN endpoint into your Alexa skill you should see it at the top left of the screen (looks like this: arn:aws:lambda:us-east-1:27971444449:function:MyNeopixelFrame) So hope back over to your Alexa tab and put it in the Endpoint Default Region input field, then save the endpoint.
Ok for now we will just leave the default code there because for this we will be writing all the code on our local machine zipping it up and putting it on the Lambda.
Writing the Lambda Locally
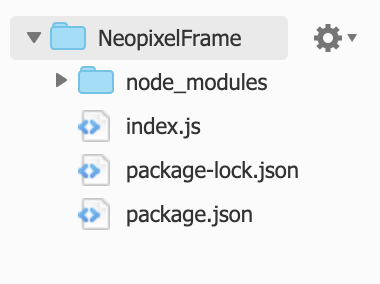
For this I recommend downloading the git project and opening the index.js file.
There is really only two files that matter here. The index.js and the package.json file. Lets start with the easy one package.json. This file containts two things we need the alxea core and the alexa model. Add those and do an npm install and thats it.
{
  "name": "alexa-skill-kit-sdk-neopixel",
  "version": "1.0.0",
  "private": true,
  "dependencies": {
    "ask-sdk-core": "^2.7.0",
    "ask-sdk-model": "^1.19.0"
  }
}
Next we can look at the index.js. This file is mostly a boilerplate skill so we will only look at the important stuff.
This function is the custom function we made in our skil under Intents called NeoINtent Basically we are looking to see if our intent was called. “Alexa ask light frame to blah blah.. ” you get it. The important thing to notice here is the async handler. This allows us to call an API and wait for it to return results before Alexa returns a response to the person asking for the task. This async await is a javascript promise. Its like a fancy callback basically. You will notice in the makeRequest function there is a new Promise created. Once this function is called the calling function “awaits” its response. It will either resolve or reject the request.
const NeoIntentHandler = {
    canHandle(handlerInput) {
        return handlerInput.requestEnvelope.request.type === 'IntentRequest'
            && handlerInput.requestEnvelope.request.intent.name === 'NeoIntent';
    },
    async handle(handlerInput) {
            let lightName = handlerInput.requestEnvelope.request.intent.slots.animation.value;
            let lightVal = (valuesMap[lightName] === 6) ? (getRandomInt(3)+1) : valuesMap[lightName];

            await makeRequest(`/update/v0?value=${lightVal}`);
                const speakOutput = `Let's get this ${lightName} light show started.`;
                return handlerInput.responseBuilder
                    .speak(speakOutput)
                    .getResponse();
    }
};
function makeRequest(path) {
    return new Promise(((resolve, reject) => {
        http.get(`${baseDomain}${path}`, (resp) => {
            let data = '';

            // A chunk of data has been recieved.
            resp.on('data', (chunk) => {
                data += chunk;
            });

            // The whole response has been received. Print out the result.
            resp.on('end', () => {
                resolve();
            });

        }).on("error", (err) => {
            reject(err);
        });
    }));
}
Once you have your code writen or used mine you would now run npm install. this creates the modules folder. Next zip up all your code and we need to push it up to the lambda function. Make sure you have your folder stucture set up with your index.js in the root folder.
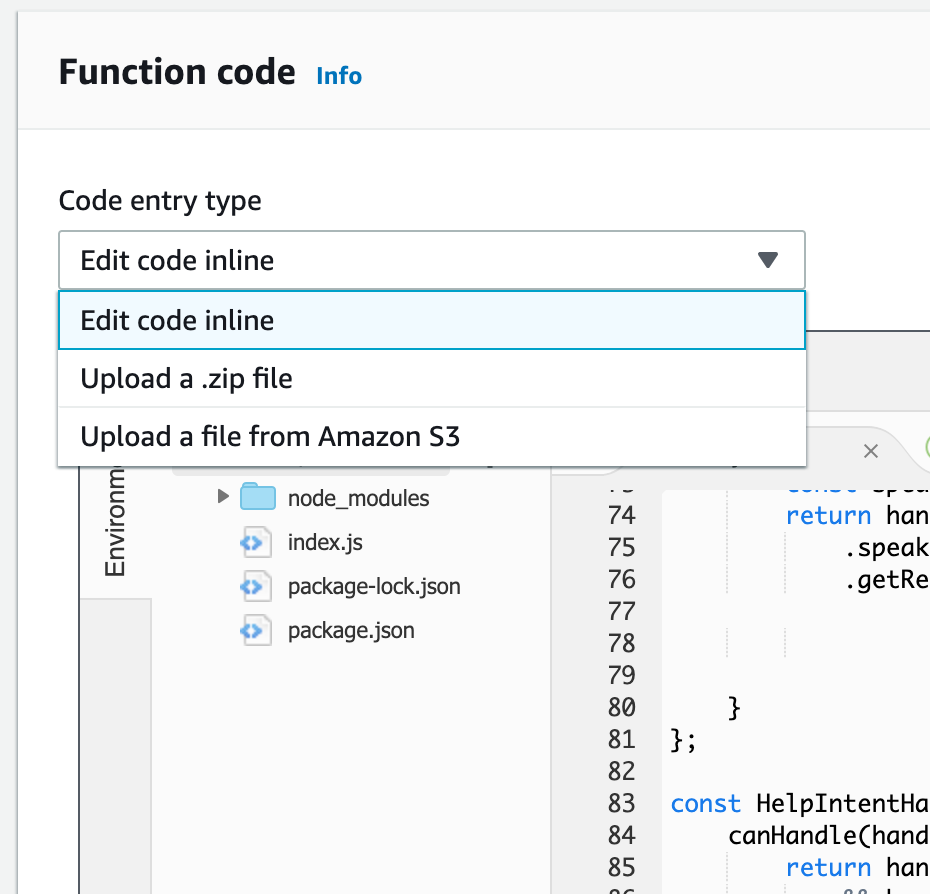
Now save this and you should have a completed Lambda.
Arduino Code
Get the code
For the Arduino Code I’m only going to talk about a few key funcitions.
int ledControl(String command)
This is the main function that sets up all the lights.
TimedAction timedAction = TimedAction(5, checkforRestCall);
It is created to help hide the mechanics of how to implement Protothreading and general millis() timing. It is sutied for those actions that needs to happen approximately every x milliseconds.
BLYNK_WRITE(VIRTUAL_PIN)
BLYNK_WRITE(vPIN) is a code function that gets called when the associated vPIn has new data
void checkforRestCall()
This is the function that’s called during the TimedAction and sets the next light animation.
The rest of the code in the ESP32-Wifi-LEDPanel-lightshow.ino file is all about the different colors. Most of this I didn’t write so I’m not going to go deep into it. The other important file you need to know is the config.h file.
In this file look for the following and set them up accordingly.
// You should get Auth Token in the Blynk App.
// Go to the Project Settings (nut icon).
char auth[] = "[YOUR KEY HERE]";

// WiFi parameters
const char *ssid = "[YOUR SSID HERE]";
const char *password = "[YOUR NETWORK PASSWORD HERE]";
The other file arcade.h is just arrays of the arcade animations.
Wiring
– IO05 Data Pin
– IO02 Ready light
![]()
The ESP32 chip requires a strong 3.3V so when you hook this up you will need to provide the 5v power with something in the order of 5-10 amps to push the lights.
Lastly
Lastly you will need to add the skill to your alexa. This can be done on your phone under Skills & Games. Just look for “Your skills” then Dev.