
Caveat
This feature requires a Pro or Enterprise subscription!
Prerequisites
- Download the geofence module
- If you want to use Android simulator: Genymotion 2.8.1+ installed for best results.
- Install the correct files for google play to use the Genymotion simulator
Setting up the tiapp.xml file
For iOS you will need to give your app some permissions alerting the user to the fact your using their location.
<dict>
  <key>NSLocationAlwaysUsageDescription</key>
  <string>We need your location so we can locate your current region location</string>
  <key>NSLocationUsageDescription</key>
  <string>We need your location so we can locate your current region location</string>
</dict>
Creating a geofence location
There are two ways to create a geofence location. One is through the Appcelerator dashboard and one is through code.
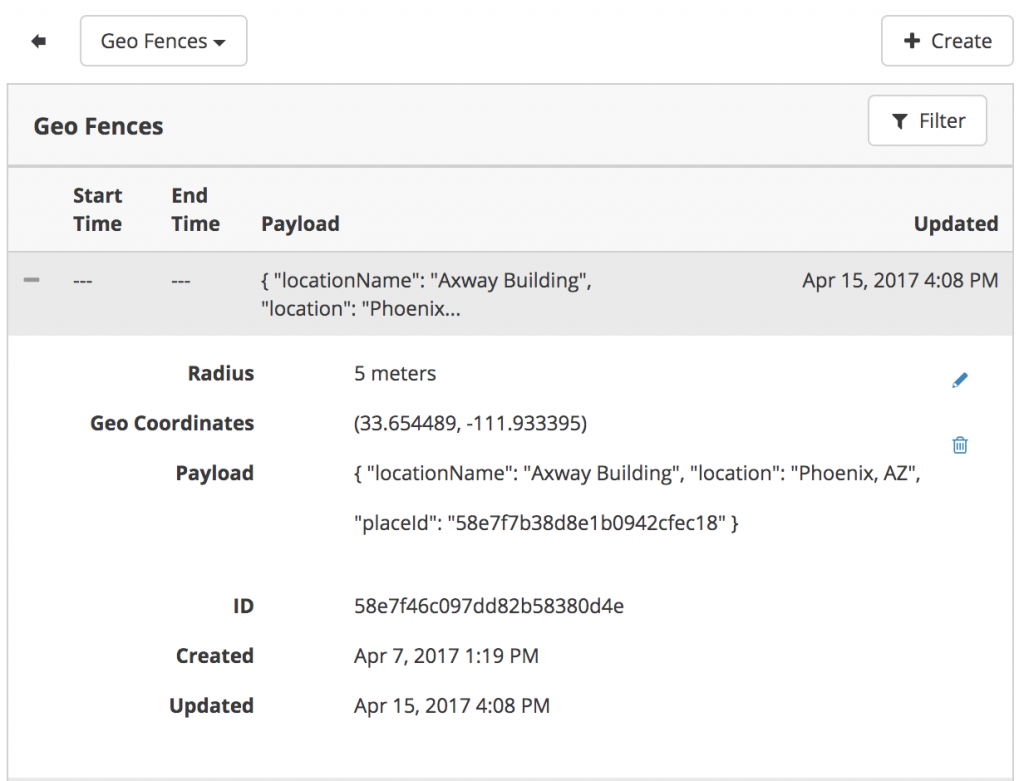
Using the Appcelerator Dashboard to create a geofence.
Login to the Appcelerator Desktop. Under your arrow application, you’ll see Manage Data, then you should see the Geo Fences link in the table to the right.

Once you are in that area you’ll want to create a new geofence. Fill out the few fields such as Geo Coordinates, Radius, and Payload and you should be set with your first geofence. (NOTE: payload can be anything you want to parse in the app. I just needs to be in the form of a JSON object).
This creates a location that will be used in code to establish a center point and radius for your geofence to be created. It also provides any useful information about this point that you might want to display or keep track of.
Calling your geofences
To use our dashboard created geofences we must query for them using the Cloud GeoFences.query
//Add this at the top of the controller JS file
var Geofence = require("ti.geofence")
Cloud = require('ti.cloud');


// Notice longitude is first in the coordinates array.
// Gets the geofences set up in arrow that are in a 2km area of your coordinates
Cloud.GeoFences.query({
    where:{
        "loc" : {
                    "$nearSphere" : {
                        "$geometry" : {
                            "type" : "Point",
                            "coordinates" : [-111.933395, 33.654489]
                        },
                        "$maxDistance" : 20000
                    }
                }
}, function (e) {
    if (e.success) {
        Ti.API.info(JSON.stringify(e.geo_fences));
        // Loop our fences and create a region using the Geofence.createRegion
        // Then add it to our startMonitoringForRegions array see code below
        Geofence.createRegion({
           center : {
              latitude : e.geo_fences[i].loc.coordinates[1],
              longitude : e.geo_fences[i].loc.coordinates[0],
           },
           radius : r[0],
           identifier : e.geo_fences[i].payload.locationName + "~" + e.geo_fences[i].payload.placeId
         })
    } else {
        alert('Error:\n' +
            ((e.error && e.message) || JSON.stringify(e)));
    }
});
Creating geofence in code.
To create the region in code then you would do it like this. Setting up a center location point using GPS coordinates, establishing a radius, and giving it an identifier.
Geofence.createRegion({
    center: {
        latitude:33.654489,
        longitude:-111.933395
    },
    radius:5, //meters
    identifier:'Axway Building'
});
Using the geofence
The main 3 events we want to focus on are start monitoring, enter region, and exit region. There are a few more but you can look those up if you need them.
Geofence.startMonitoringForRegions([regions]);
Geofence.addEventListener("enterregions", function(e) {});
Geofence.addEventListener("exitregions", function(e) {});
The first thing you want to do after you have your geofence regions created is start monitoring them.
So you would create your regions in code either dynamically using the cloud query, or statically. Then add each region to an array and send it to the Geofence.startMonitoringForRegions. This kicks off the monitor.
After that you add event listeners to the Geofence object to listen for things like entering or exiting regions.
Now if someone enters into any geofence area you have established you can send off and alert, or pop push a notification to a group of users, or what ever you can think of.