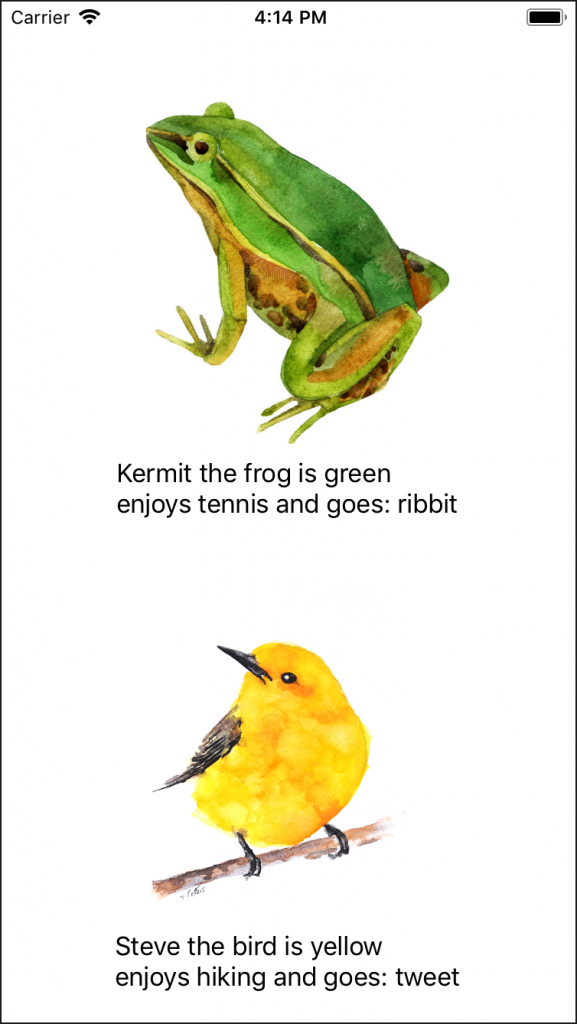
Starting with Titanium SDK 6.1.0, Appcelerator started supporting ES6. But you may be asking yourself, how do I use ES6 with Appcelerator? So here is a simple example on how to use some of what ES6 has to offer in your Appcelerator App.
ES6 Elements Used:
- Fat arrow functions
- Classes
- Inheritance
- Template Literals

Lets start with our Application class. This will get our Window element from Alloy and expose a couple of functions to add to the Window object and open it on load.
class Application {
   constructor(win) {
     this.window = $.index; //window defined in index.xml
   }
   open() {
     this.window.open();
   }
   add(view){
     this.window.add(view);
   }
}
Next lets create an AnimalView. This is really only to show that you are able to extend classes in ES6 and inherit elements from the parent class with ease. So in a class you always need a constructor so here we will add a few params to our constructor to keep things simple.
Since this is a view we need to address how we get that view onto our application. So we will instantiate a new view by calling Titanium.UI.createView and assigning it to this.view. Our View also needs an image so we can do the same thing for our image. Ti.UI.createImageView and assign it to this.imageView. Next we want to add a sound function to hear what our animal sounds like. So lets create a fat arrow function and print out what the sound of or animal is. Lastly we will add our imageView to our View and move on to the next class.
class AnimalView {
   constructor(name, sound, type, imgSrc) {
     this.name = name;
     this.type = type;
     this.sound = sound;

     var playSound = () => {
       console.log(this.sound);
     }

     this.view = Titanium.UI.createView({
       layout : "vertical",
       height : "50%"
     });

     var imageView = Ti.UI.createImageView({
       image: imgSrc,
       height : "80%"
     });

     imageView.addEventListener("click", () => {playSound()});
     this.view.add(imageView);
   }
}
This Class will be our concrete AnimalView Class in this case a BirdView. Again we start by adding a constructor and passing our Class some parameters. Since the BirdView extends AnimalView that means it inherits everything from the AnimalView we need to call super and pass the AnimalView some arguments, then give our BirdView some characteristics that belong only to a BirdView, such as color and hobbies. Now the BirdView has a special label explaining the attributes of the BirdView so lets create that label. Ti.UI.createLabel and assign it to this.label. Next we need to add that label to the view. Remember this.view is inherited from the AnimalView so that when we call this.view.add(this.label) its actually adding it to the parent class AnimalView’s View. Note inside our createLabel we are using Template Literals. This allows us to put in values with out having to concatenate strings.
class BirdView extends AnimalView {
   constructor(name, color, type, hobby){
     super(name, "tweet", type, "/images/bird.jpg");
       this.color = color;
       this.hobby = hobby;

       this.label = Ti.UI.createLabel({
         text : `${this.name} the ${this.type} is ${this.color} \nenjoys ${this.hobby} and goes: ${this.sound}`
       });

       this.view.add(this.label);
   }
}
Lastly, we need to add all our views together and add them to our application. Here we create a new instance of Application and add our BirdView to it. Then we call open on our Application which opens the window.
//open view
let app = new Application();
app.add(new BirdView("Steve", "yellow", "bird", "hiking"));
app.open();
This is what we would have in our Alloy file index.xml NOTE: this is not needed but I wanted to show that you could use Alloy in conjunction with Classes. If you didn’t want to use this you could just as easily do this
this.window = Ti.UI.createWindow(); to create the instance of the window.
<Alloy>
   <Window class="container" layout="vertical" top="50"/>
</Alloy>
