If you read my previous article about controlling a Raspberry Pi with an iPhone. This article expands on that and shows you how to create a socket based iPhone app and server to do even more!
Required items:
– Xcode
– Python
– WiFi
– Patience
– Twisted
Assumptions:
– You read the last article
– You know how to access your Pi via SSH
Lets begin
You should already have python on your Raspberry Pi but you might not have twisted. So in order to install that open a command line and type in the following command. This will install the twisted module onto your Raspberry Pi.
sudo apt-get install python-twisted
If you don’t want to type the server code you can get the server here if you like. In your terminal just copy and past the following lines.
wget http://mypocket-technologies.com/iphoneserver
Here we have the python script that is responsible for listening to the network and turning on or off the LED. You will note that this is a little different script than from my previous article but it does the exact same thing.
from twisted.internet.protocol import Protocol, Factory
from twisted.internet import reactor

import RPi.GPIO as GPIO

GPIO.setmode(GPIO.BOARD) ## Use board pin numbering
GPIO.setup(7, GPIO.OUT) ## Setup GPIO Pin 7 to OUT

class RaspberryLight(Protocol):
	def connectionMade(self):
		#self.transport.write("""connected""")
		self.factory.clients.append(self)
		print "clients are ", self.factory.clients

	def connectionLost(self, reason):
		print "connection lost ", self.factory.clients
		self.factory.clients.remove(self)


	def dataReceived(self, data):
			msg = ""

			if (data == 'P7H'):
				msg = "Pin 7 is now High"
				GPIO.output(7, True)

			elif (data == 'P7L'):
				msg = "Pin 7 is now Low"
				GPIO.output(7, False)


			print msg

factory = Factory()
factory.protocol = RaspberryLight
factory.clients = []

reactor.listenTCP(7777, factory)
print "RaspberryLight server started"
reactor.run()
Once you have python script in place you can start the server
sudo nice -10 python iphoneserver
ALRIGHT ALREADY GET TO THE IPHONE CODE
First we will deal with the ViewController.h file.
Add the following in the interface. We need variables for input and output steams as well as the UISegmentedControl.
Well also need to make a Method so that the toggle button will do something.
@property (nonatomic, retain) NSInputStream *inputStream;
@property (nonatomic, retain) NSOutputStream *outputStream;
@property (weak, nonatomic) IBOutlet UISegmentedControl *lightToggle;

- (IBAction)ToggleLight:(id)sender;
Now make sure you add the delegate NSStreamDelegate to the interface
@interface ViewController : UIViewController<NSStreamDelegate>
Moving On
So believe it or not connecting to a network is pretty easy. Theres basically only a few lines of code..
The first thing we want to do is create a method that will do the connection. So in your ViewController.m file of your controller you will want to add this. Replace the [YOUR IP ADDRESS HERE] with your own IP (something like 192.168.0.112)
- (void)initNetworkCommunication {
    CFReadStreamRef readStream;
    CFWriteStreamRef writeStream;
    CFStreamCreatePairWithSocketToHost(NULL, (CFStringRef)@"[YOUR IP ADDRESS HERE]", 7777, &readStream, &writeStream);
    _inputStream = (NSInputStream *)CFBridgingRelease(readStream);
    _outputStream = (NSOutputStream *)CFBridgingRelease(writeStream);

    [_inputStream setDelegate:self];
	[_outputStream setDelegate:self];

    [_inputStream scheduleInRunLoop:[NSRunLoop currentRunLoop] forMode:NSDefaultRunLoopMode];
	[_outputStream scheduleInRunLoop:[NSRunLoop currentRunLoop] forMode:NSDefaultRunLoopMode];

    [_inputStream open];
	[_outputStream open];

}
Next well need to call that so in the viewDidLoad lets make our networkConnection
[self initNetworkCommunication];
In that same viewDidLoad set the segmentIndex so that it off by default.
_lightToggle.selectedSegmentIndex = 1;
Now we need to connect our button with some code. Here we are getting the sender, in this case a UISegmentedControl and grabbing the tag and which segmentIndex that has been selected. We build a NSString and use the NSData Object to encode and send it to our output stream. The response string should either be P7L or P7H (high or low)
- (IBAction)ToggleLight:(id)sender {

    UISegmentedControl *button = ((UISegmentedControl*)sender);
    long tag = button.tag;

    NSString *response  = [NSString stringWithFormat:@"P%ld%@", tag , button.selectedSegmentIndex?@"L" : @"H"];
    NSData *data = [[NSData alloc] initWithData:[response dataUsingEncoding:NSASCIIStringEncoding]];
    [_outputStream write:[data bytes] maxLength:[data length]];

}
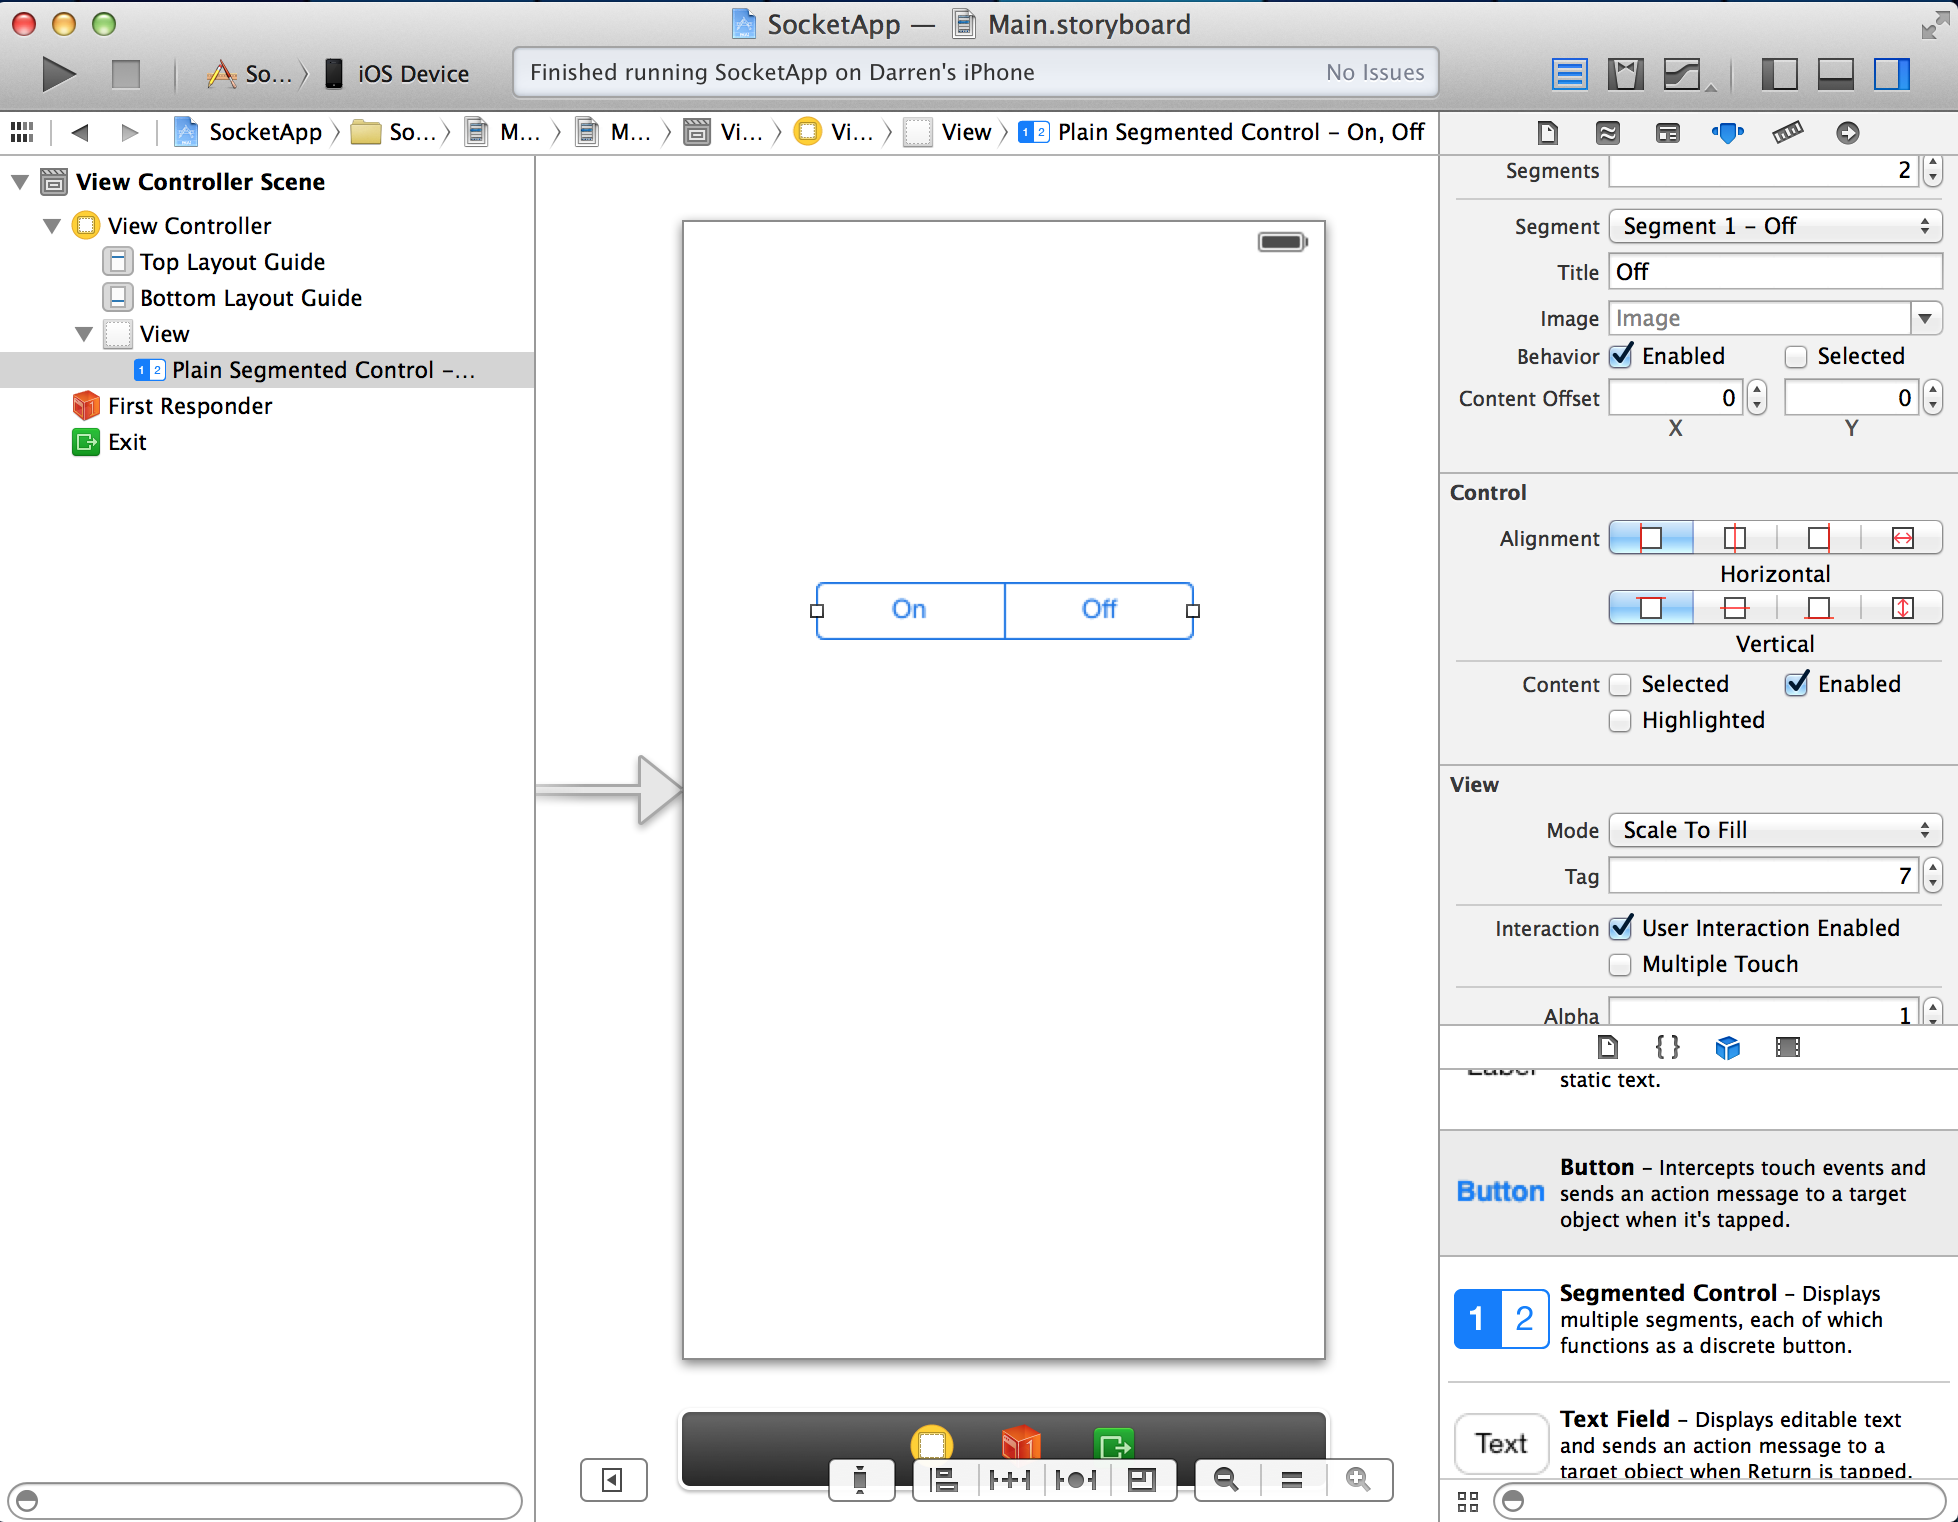
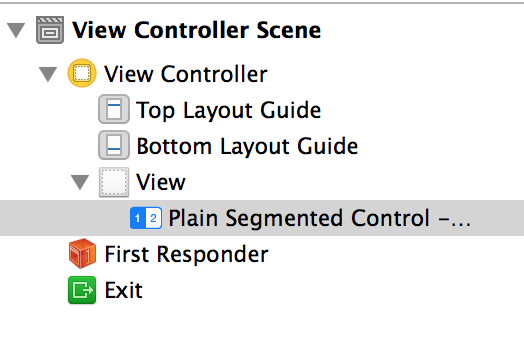
If we open up our storyboard we want to do some connecting. So first grab a segment button and drag it to into the UIView. In the Attribute Inspector find the tag attribute and set it to 7. This is our pin number we are targeting.

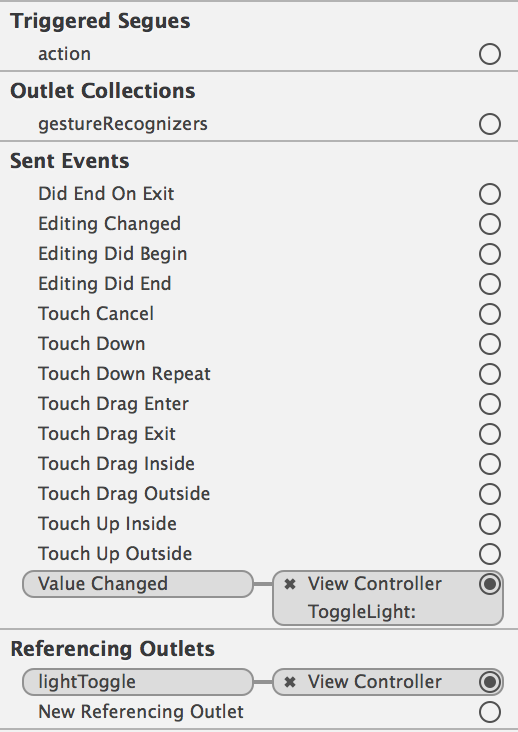
Next click the Connections Inspector that’s the circle with the arrow in it ![]() . Now look for the touch up inside event, and click the + symbol and drag the line to the first responder box icon, then choose ToggleLight.
. Now look for the touch up inside event, and click the + symbol and drag the line to the first responder box icon, then choose ToggleLight.
Do the same thing for Referencing Outlets only drag it to the View Controller icon.


That should be it! run it and you should see messages coming over the terminal!
UPDATE: Want to run your python script automatically? Heres what you need to do.
-Create a file called automaterStarter.sh
Type in
#! /bin/sh
# /etc/init.d/automatorlauncher.sh

### BEGIN INIT INFO
# Provides:          automaterStarter.sh
# Required-Start:    $remote_fs $syslog
# Required-Stop:     $remote_fs $syslog
# Should-Start:      $portmap
# Should-Stop:       $portmap
# X-Start-Before:    nis
# X-Stop-After:      nis
# Default-Start:     2 3 4 5
# Default-Stop:      0 1 6
# X-Interactive:     true
# Short-Description: Example initscript
# Description:       This file should be used to construct scripts to be
#                    placed in /etc/init.d.
### END INIT INFO
cd /home/pi
sudo nice -10 python iphoneserver.py&
cd /
Save the file and place it in your /etc/init.d folder of your raspberry pi. Lastly run this command
sudo update-rc.d automaterStarter.sh defaults
Reboot and your should have python running automatically
